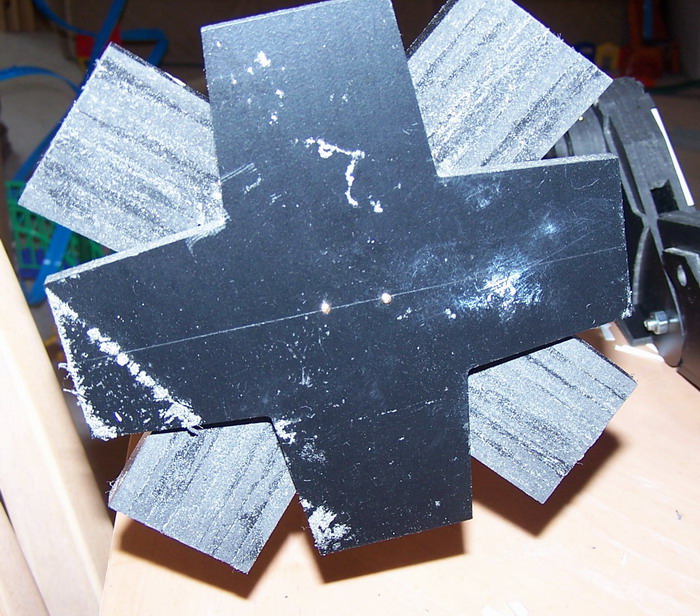
I've done some work on my new Warlord Titan. The changes were both structural reinforcements and cosmetic. I've decided to put pictures online for anyone else with one of these so they might get some ideas for their own. The above picture shows the underside of a foot. The dots are 0.75" brass nails (called extrusion pins). I've drilled up into the ankle pieces. If I didn't do that a sideways bump could take the feet right off.
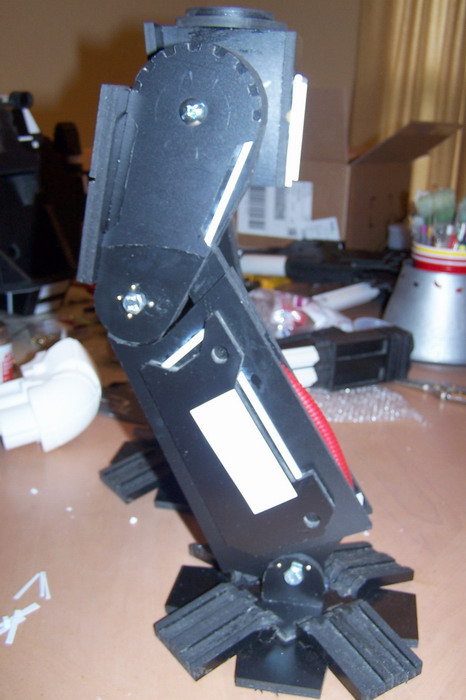 Above are the legs. You can see two more brass nails on the side of the ankle and four on the knee. I've added two pieces of square plastic tube to the backs of the trim pieces on both the thigh and calf. The piece on the top of the calf portion is a rod. Adding those pieces immediately took the look of the legs from kind of bland to very cool. I would highly suggest everyone to do that.
 Here are the backs of the legs and hips. There are brass nails going through the black sintra and into the PVC pipe as shown and on the front as well. You can't see it here, but the white plastic card covers the area where I used two very large drywall screws to go through the back sintra piece and into the PVC pipe as well. Before I did this his torso would spontaneously lean forward.
I've drilled from the top hip piece so a long bolt (1/4-20) could reach all the way through the hip PVC pipe into the crotch torso box. This allowed me to bolt all the way through.
You can see that I put some 0.5" car wire channel tube in the open area of the back calf muscle as well as a small piece of plastic rod. It really improved the look (looks better in person).
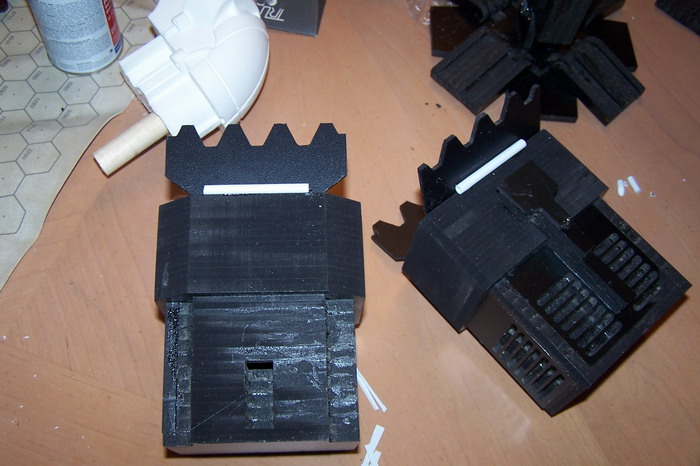 These are the Apocalypse Launchers with their doors open. There isn't an area for these doors to attach so I had to put in a 3/16" plastic tube. Worked like a charm.
 The Quake Cannon had a big, featureless portion, so I put some card and plastic strips on to break it up a bit.
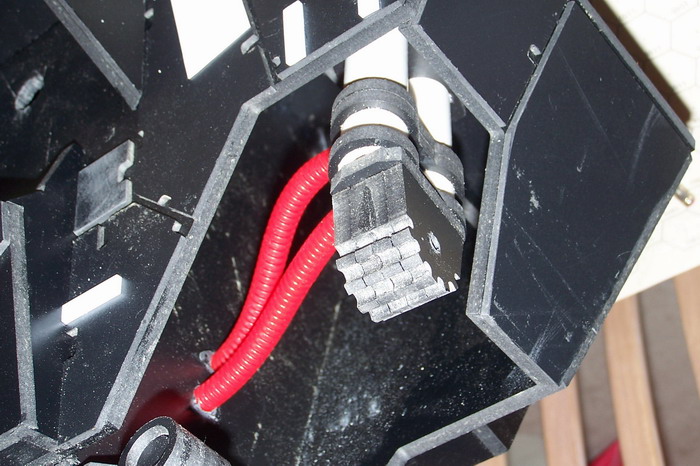 Here's the big change. The weapons were originally held on the elbows with a drywall screw going into a very small hole on the elbow. Instead I've tapped the elbow to fit my favorite bolts. I think it'll go quicker too.
As you can see, I've used some more plastic automobile tube. The texture is very common on the Armorcast titans, so I think it helps keep things a little more consistent.
 Lots more plastic card to add some detail.
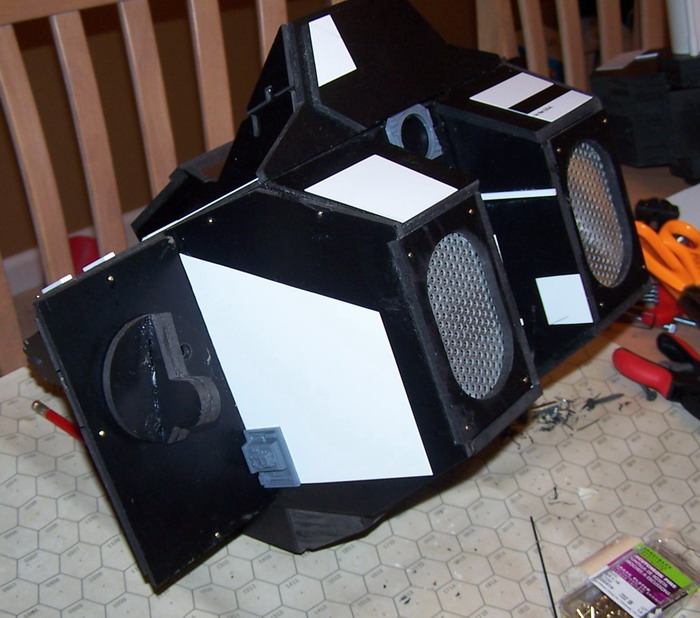 I used the back of one of the Bastion's weapon mounts as a control panel. You can also see a lot more reinforcing brass nails. Many of these were required to prevent the pieces from coming apart. They flexed and cracked quite a few times before I did this.
 The "view from the top" shows some of the detail that I put between the exhaust stacks. The middle part is the Bastion escape hatch while the other two are weapon mounts (the backs being used as the control panels (as mentioned above).
Lots more plastic card to add some detail.I used the back of one of the Bastion's weapon mounts as a control panel. You can also see a lot more reinforcing brass nails. Many of these were required to prevent the pieces from coming apart. They flexed and cracked quite a few times before I did this. The "view from the top" shows some of the detail that I put between the exhaust stacks. The middle part is the Bastion escape hatch while the other two are weapon mounts (the backs being used as the control panels (as mentioned above).You can also see the acrylic Aquila (Imperial Eagle). This and a smaller one are going to get pins on their backs so they can be removed when in Chaos Mode.
I hope to get it primed over the weekend. I've purchased some automobile spray primer which I've heard works well on this material. Let me know what you think!

I saw your thread on Siege World about building this glorious monster. What details can you share about it? How did you design and make it? What's it made out of?
ReplyDeleteAwesome stuff, keep it up.
-Jordan